

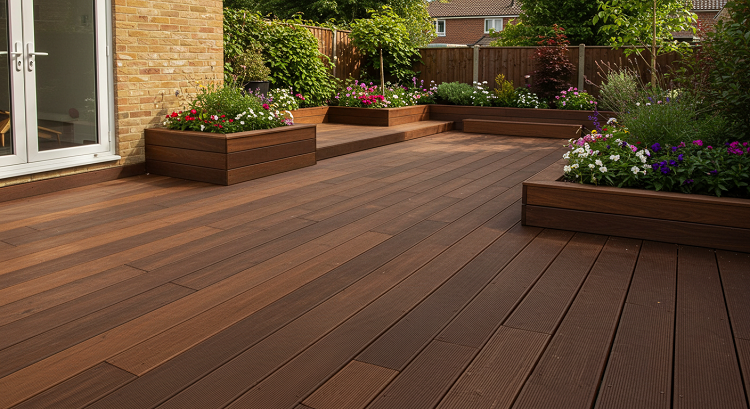
Garden decking takes hits all year. Sun bakes it. Rain soaks it. Cold nights make it shrink. Warm days make it swell. Feet, pets, chairs, and planters grind dirt into the grain. Boards start to look grey, rough, and cracked. That doesn’t mean the deck is done. It means the deck is asking for help. The real question is simple: fix the parts that are worn, or swap them out? Here’s an easy way to tell.
Why garden decks wear out
Wood hates two things working together: water and sun. Water sneaks in and makes boards swell. When the sun comes back, the boards dry and shrink. That push and pull opens tiny gaps. Dirt settles in and holds more water. Over time, small cracks turn into big splits. Nails or screws get loose. Rails wobble. None of this happens in one day. It builds up across seasons. Seeing the signs early saves money and keeps everyone safe.
Quick checks you can do today
Start with a water test. Drop a little clean water on a dry board. If it beads up, there’s still some protection. If it soaks in fast and darkens the wood, the shield is gone and the deck needs new finish soon.
Next, try the “poke test.” Use the tip of a screwdriver on spots that stay damp, such as the bottoms of posts, ends of boards, and places near planters. If the tip sinks in with little pressure, the wood is soft and may be rotting.
Look along each board from the side. Boards that cup, twist, or have long splits may not hold fasteners well. Wiggle the railing and steps. Any wobble is a safety issue, not just a looks problem. If this feels like a lot or time is tight, a local team that offers Deck Restoration Services can handle sanding, sealing, and other heavy jobs so the wood lasts longer.
When a repair is enough
Many decks only need light fixes. If cracks are hairline and the board still feels firm, sanding can smooth it. If one end is ugly but the rest is strong, a short cut and re-fix at the joist can save the board. Loose nails or screws are an easy win: pull the nail and replace it with a decking screw of the same length or slightly longer. A few raised fasteners make a deck feel rough and unsafe, so sinking them back in makes a big difference.
For color that faded but wood that is still solid, stain can bring back the look and add protection from sun and rain. Semi-transparent stain keeps the grain visible. Solid stain hides more flaws on older boards. A clear sealer is fine when color still looks good but the water test shows the shield is weak. These surface fixes work best when the structure underneath is dry, square, and tight.
When replacement is safer
Some boards are beyond saving. If a screwdriver slips in with little push, the wood fibers are breaking down. If a split shoots all the way across the width, that piece can snap under weight. If a knot has fallen out and left a big hole, that area is weak. Replace boards with any of these signs.
Check the frame too. Posts should feel locked in place. Beams should look straight. Metal hangers should not be rusty or bent. If the frame moves, squeaks, or sags, surface work won’t fix the real issue. That’s a job for a skilled adult or a licensed pro. Safety comes first because people stand, walk, and play on this structure.
Prep that makes any fix last longer
Good prep beats fancy products. Clear the deck. Sweep grit and leaves. Wash with a deck cleaner or mild soapy water. Rinse well. Let it dry fully. Wood should look the same color all over with no dark damp lines. Rushing this step traps water under the new finish.
Sand rough patches with medium-grit paper and finish with fine-grit. This opens the grain so stain or sealer can soak in. Wear eye protection and a dust mask. Vacuum or sweep the dust so the new coat sticks well. Tap down or replace raised fasteners. Tighten loose rails. Finish never replaces solid hardware.
How to choose between sealer and stain
A clear sealer is the best call when the deck still looks good and only needs a water shield. It soaks in and slows down swelling and shrinking. It also makes cleanup easier because spills don’t sink in as fast. Expect to recoat every one to two years in strong sun or heavy rain. Use the water test each spring to decide.
Stain adds color and protection. Use it when the deck looks faded or blotchy. Semi-transparent stain shows the grain and looks natural. Solid stain covers more, which helps older boards look even. Stir the can so the color stays the same from start to finish. Work in long strokes along the boards. Keep a wet edge to avoid lap marks. Two thin coats beat one thick coat because they dry better and last longer.
Safe board swaps without drama
When a board needs replacing, measure the length and thickness first. Match the same type of wood and size if possible. Mark the joists under the bad board so the new screws hit solid support. Cut the old board out. Pull old fasteners and check the joist top. If it’s damp or damaged, let it dry and repair it before adding the new board. Pre-drill the ends of the new board to prevent splits. Use decking screws for a strong hold. Keep the screw heads just below the surface, not buried deep.
For steps, be extra careful. Steps carry more weight and need firm grip. If one tread is weak, look at the stringers (the side supports) too. Replace any cracked or rotted parts before you fix the top boards.
Basic care that keeps problems small
Clean the deck a few times a year. Sweep often. Rinse off mud and pollen. If using a pressure washer, hold the tip back and keep pressure low. Too much pressure can carve lines into the wood.
Move planters and rugs every few weeks so the deck wears evenly. Put pads under chair legs to prevent scratches. Catch spills fast, especially grease from a grill. A small tray under the grill saves the finish. Trim plants near the deck so air flows and boards dry faster after rain.
Do the water test each spring. If drops soak in, plan a recoat before summer heat. Keeping up with small jobs means fewer big repairs later.
Tools and materials that help
You don’t need fancy gear. A stiff broom, bucket, mild cleaner, and a hose handle most cleaning. For repairs, a drill-driver, decking screws, sandpaper, and a saw handle many tasks. For finishing, a brush for edges and a pad or roller for big areas work well. Gloves and eye protection keep the work safe. Read product labels for dry times and clean-up steps; they exist for good reasons.
Cost and time made simple
Repairs cost less than full replacement, but time is also part of the deal. Replacing a few boards and sealing the surface can fit into a weekend. Staining may need an extra day for dry time. A bigger rebuild takes longer and may need permits or skilled help. Plan around weather. Aim for dry days with mild temps. Hot boards make finish flash-dry and leave marks. Cold, wet days stop the finish from curing right.
Clear steps you can follow
Here’s a calm path that works for most decks. Check the structure first. Fix wobble, rot, and loose parts. Clean the surface and let it dry. Sand rough spots. Do the water test. If color looks fine but water doesn’t bead, seal it. If color looks dull or patchy, stain it. If boards are soft or split through, replace them, then finish the surface. Keep coats thin. Give them full dry time. Keep up with light cleaning and quick checks through the year.
What to remember
Garden decking doesn’t fail in one week. It changes a little each season. Small care steps stop small problems before they grow. Repairs handle minor damage. Replacement handles weak boards and unsafe parts. Sealer keeps water out. Stain adds color and more protection. Pick the fix that matches what the deck shows today, not what is wished for. With steady care and smart choices, the space stays safe, looks good, and stays ready for hangouts, meals, and quiet mornings outside.